.jpg)
Clarity is an all in one community management software for nonprofit organizations of all shapes and sizes. With that, there are a lot of different ways that you can configure your environment to make it work for your specific organization model. Getting started, however, has similarities amongst all models. This article will act as a guide to getting started with any type of nonprofit model that does direct beneficiary work.
Before we get too far ahead of ourselves, one thing to remember is that our team is always here to support you. So, if you catch yourself struggling with understanding how to use Clarity, please don’t hesitate to reach out to [email protected]. One of our partner success team members will be happy to help you!
Please be advised that if you are a donor, you will be provisioned with access by your organization and do not need to sign-up directly through Clarity’s landing page. The sign-up process is for organizational managers or administrators to get their organization started on Clarity.
Let’s get started!

You will notice two buttons on the top right corner of the screen. One of the buttons says “Login” and the other says “Get Started”.
If this is your first time exploring the use of Clarity for your nonprofit’s community management or charity membership software, you will want to start by clicking “Get Started”. This will allow you to start your free 14 day trial and get started with building your donor/beneficiary members.
Once you click “Get Started” you will be brought to a form where you can sign-up your organization, accept the terms and conditions and privacy policy, set your password and begin!
If you have tried Clarity and decided that it works for you, or if you simply set up an account on your last visit but weren’t able to get started, you can login by clicking the button “Login” and bypassing the sign-up process.
Into the Platform
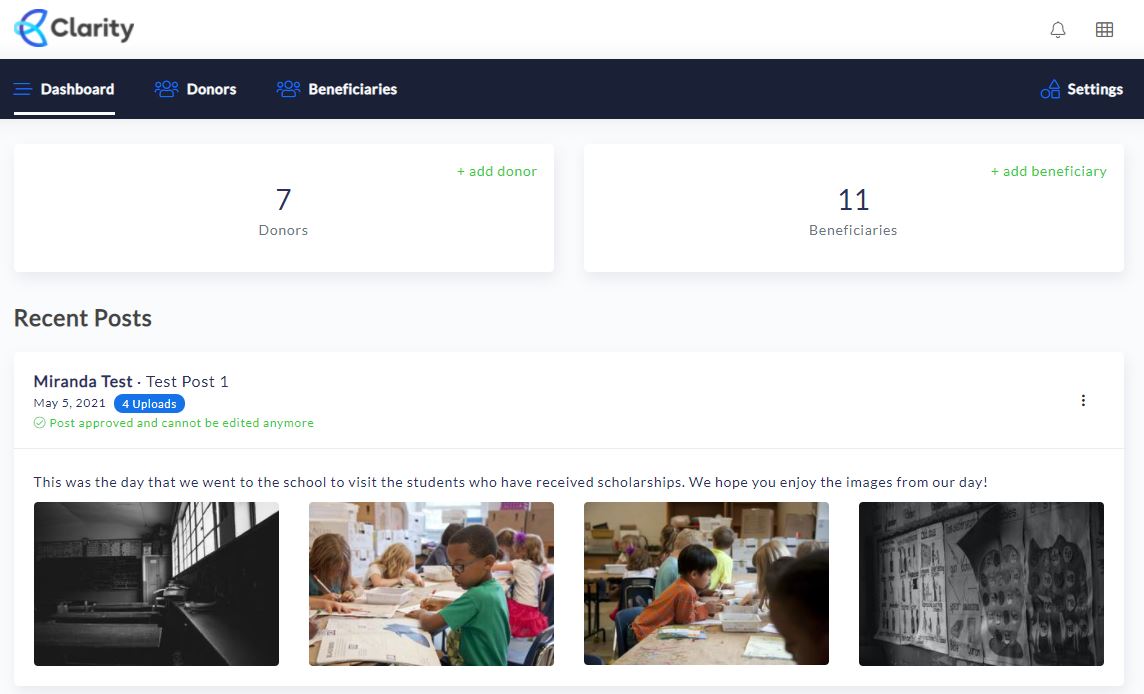
Once you have signed up and signed in, you will be brought to the organization's “Dashboard” which shows a brief overview of the organization’s community, and any recent posts. If you haven’t started using Clarity, this section will not have any recent posts from either beneficiaries or donors. This will come with more usage as you start providing updates to your community, or allowing direct correspondence donors and beneficiaries.
Adding your donors
The first step to building your nonprofits private community is to add your donors. To do this, you will want to click the “+ add donor” button, or navigate to the Donors menu option and press “+ Add Donor” from that window.
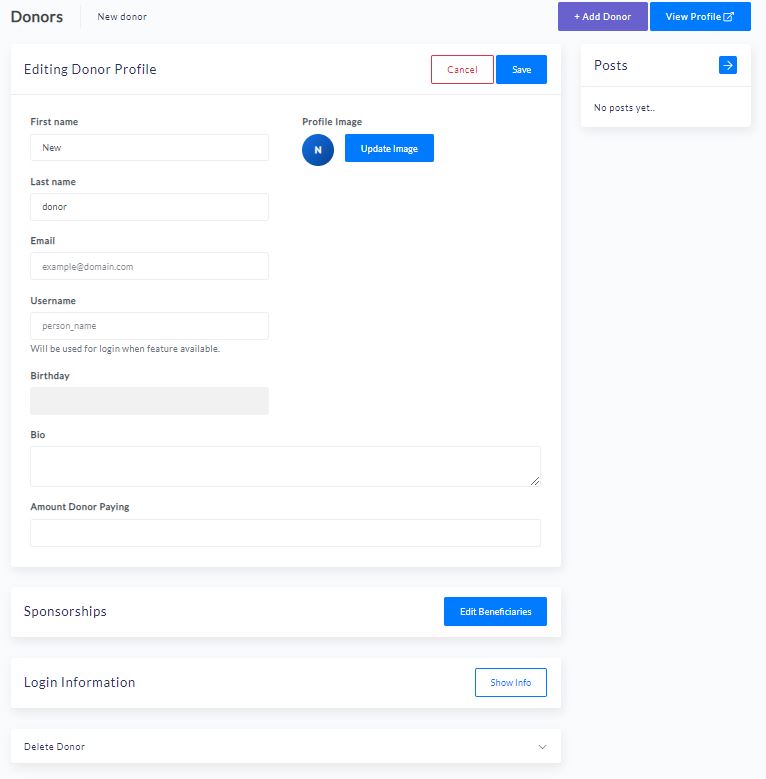
Once you click to add a donor, you will see that there are fields to add the donors information.
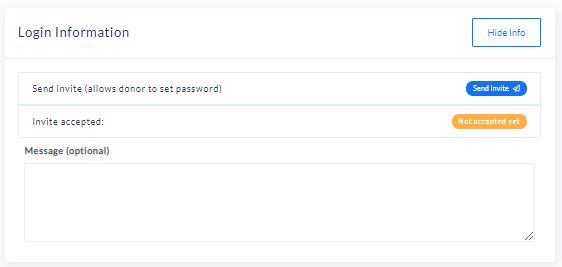
Once you have added the donor’s information, you will be able to send them an email from the “Login Information” section. This will allow the donor to set-up their own password and login to your internal nonprofit community.
Please note that the information you add to the donor’s fields can be updated by the donor by default - the goal is to allow them to update their information to the most accurate over their years of supporting your initiatives. You can, however, define in the settings that the donor should not be able to change their information. We recommend doing this for “Email” specifically, as this is the easiest way to ensure you always have their contact information correct for their profile’s access.
At this point, your donors will be able to access their profile and join your community 😁!
Adding your Beneficiaries
Adding beneficiaries works similarly to adding donors, except you will be working out of the “Beneficiaries” menu item.
Once you have clicked the tab for “Beneficiaries” in the main navigation menu, you can click “+ Add Beneficiary”.
Beneficiaries can be thought of as any group, individual, project, association, entrepreneur, family, or community that will be benefiting from your organization's mission. With that, you are able to add custom fields to the templated beneficiary profiles in order to make it work specifically for your nonprofit organization. We have another knowledge article on the way that will specifically address adding and customizing your profiles (for both donors and beneficiaries) with custom fields.
In the same way as you did for donors, you can now fill out their information and create posts that will be shared with the donor that is tied to this beneficiary. At this point, we do not open up the login access to beneficiaries by default. If you would like to, it is possible. Reach out to [email protected] to get started with this.
Making the Connection
Upon uploading all the details associated with your donors and beneficiaries, it is time to get connected.
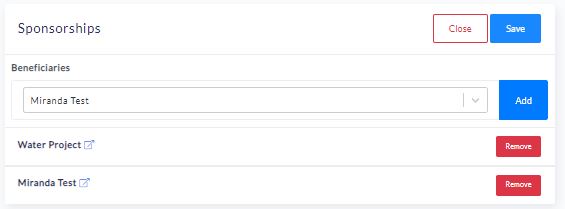
Donors, or groups of donors, can now be connected directly to different beneficiaries from the individual donors profiles. These connections are robust, so feel free to get creative. The connection internally could be three donors donating to the scholarship of one student, or it could be one donor providing the whole portion of the scholarship costs. It could also be a group of ten donors that all donate in a recurring model to a single project. Further, maybe one of those donors from the group of ten also pays the tuition for a child to attend school. Well, that specific donor could be tied to the group sponsorship of the project, and also the direct sponsorship of the student.
The platform has been built to work with any types of donor/beneficiary models, and configurability is up to you, as the organization, to define how the relationships are set within your organization’s internal social network community.
As a friendly reminder, be sure to click “Save” in the sponsorship section before changing pages. There will be a notification that the sponsorship has been saved if you have done all things correctly.
Ultimately, you have complete control over who is going to be able to see what information. Which is important - because the information is sensitive and should be treated that way.
You are now ready to get started, so go ahead and add all your users, and start posting content and sharing information between your organization, the donors, and (if desired) allow your beneficiaries to have access and share information about their lives themselves. All this can be moderated, to ensure it is appropriate, which will be discussed in our “Approvals” knowledge article.
If you have any questions or concerns, or simply need a bit more help to get started, don’t hesitate to reach out to [email protected]!