
Connecting your Nonprofit’s Network with Community Management Software
The purpose of this knowledge article is to guide administrators through the connection process, which can be used to provision direct relationships between donors and beneficiaries.
Whether you have decided to use Clarity as a charity membership database, a community management platform, or a child sponsorship software, the means of creating the links within your community follow the same process - which will be explained further in this knowledge article 😀.
We recognize that not every organization is going to want to allow direct communication between their donors and beneficiaries, which is totally fine!
Clarity has been built in a way that CAN allow direct communication and complete transparency between donors and beneficiaries, but doesn’t have to. We intentionally keep the organization in control of what their users can do.
If you are using Clarity specifically to keep your community of donors updated by providing a history of giving, the process for completing the database connection between users is the same. You will still want to connect donors to the information - that you will provide - that is relevant to them. The functionality differences within Clarity come from who you allow to log into the platform with their own profiles, and who you don't, which can be decided by your team and set up in your configuration settings.
Requirements for Getting Started with Donor-Beneficiary Database Connections
In order to make database connections between donors and beneficiaries, you must have at least one donor and one beneficiary created in the platform.Our general recommendation for organizations that are just getting started with Clarity, is that all users are migrated onto the platform prior to any connections being made. This will allow you to make the connections all at once. If you need additional information on how to get started with the migration into Clarity, see the following knowledge article:
Getting Started With Clarity!
After the initial migration, as new beneficiaries are being added to the platform, or if new donors get involved with funding current projects, the users can be configured “on-the-go” and connections can be established as you add the donors into the platform. However, on the first migration you will likely save quite a bit of time by migrating the data onto the platform first, then creating the connections.
Creating the Connections
Assuming the requirements above have been met, we will now explain the process for creating relationships between donors and beneficiaries.Donor relationships come in many forms. A single donor may provide support to one project or person specifically, or that single may donate to multiple initiatives. Similarly, it is not uncommon for a single beneficiary to receive donations from multiple donors. All of these scenarios are able to be connected in Clarity, providing the most personalized “history of giving” specific to both the donors and the beneficiaries.
The community connections start from the donor profiles to make it easy on the organization’s admin who will likely most frequently be processing a new donation, and adding the new donor to the community.
To get started with making a connection, navigate to “Donors” in the navigational menu. Once you have completed this step, simply select the donor you would like to connect to a beneficiary. This will open their profile.
An example of a donor profile is shown below. This profile was created for a child sponsorship donor, so the terminology you will see in all of the example images will be related to this type of program. As a note for the readers, different configurations of profile data is absolutely possible.
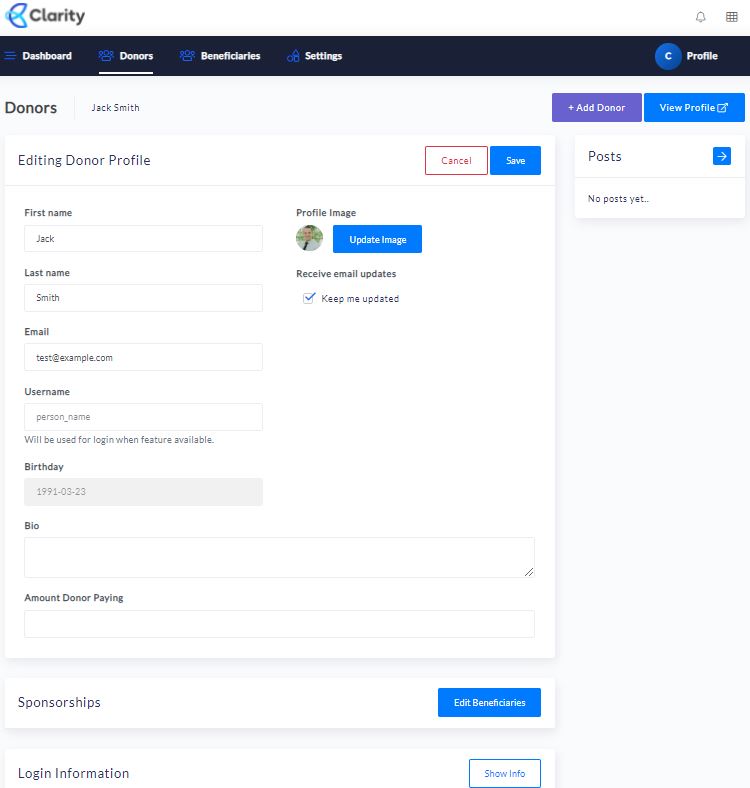
Once the donor profile has been opened, the next step is to navigate to the connections section. Due to this profile being used for a child sponsorship program, the title shown in this example is “Sponsorships”. Scroll down to “Sponsorships” (or equivalent) and click the “Edit Beneficiaries” button on the right hand side of the profile section. The following image shows what you should see once this button has been clicked.
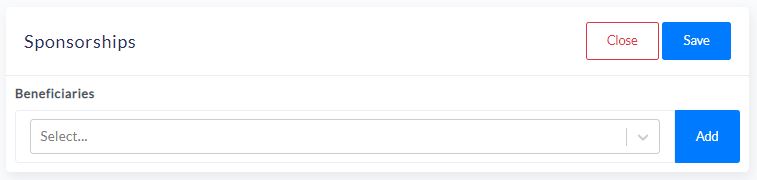
As shown above, a search bar will appear that allows you to navigate to the beneficiary that this donor is supporting. Simply use the drop down menu, or start typing in the name of the beneficiary, and you will be able to click “Add” and “Save” to make the connection official.
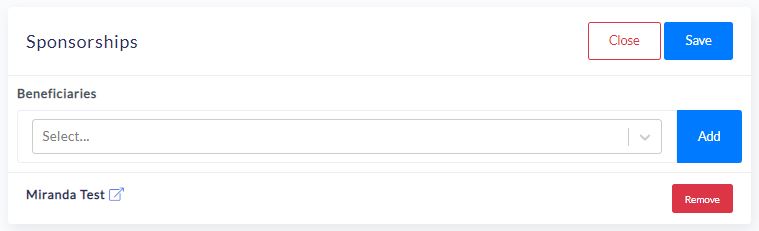
Once completed and saved, the following image will be displayed which indicates that this donor is providing donations for this beneficiary.
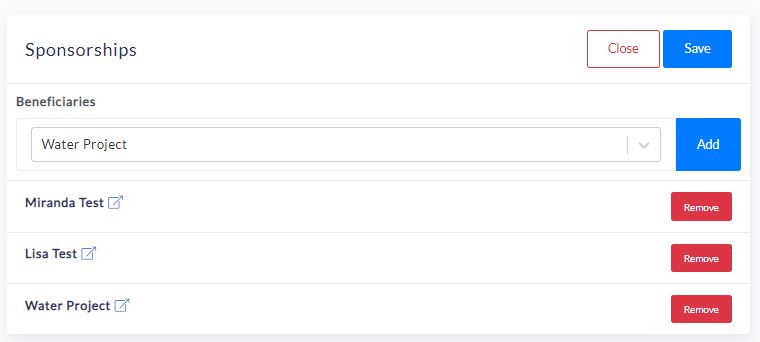
As noted previously, donors can provide donations to multiple initiatives or beneficiaries within your nonprofit. You can add as many beneficiaries to a donor as you’d like. As they are added, the donor will be able to receive automated email updates related to the beneficiaries that are tied to the donor's profile. This means, the updates you send through the platform to the donor will be specific to the beneficiaries they support. This is important in modern giving, as the donor will be kept updated on only the beneficiaries that resonated with them. Further, these updates are personalized for what the donor chose to give to, and therefore are more relevant to the donor. The following picture shows a donor with three beneficiaries that they will receive updates from.
This level of transparency and personalization can be leveraged to campaign directly to donors that care about specific parts of your mission.
Be sure to set up your database connections strategically and in a way that will get the most engagement out of your donors. It’s hard for donors to churn, or lose interest in your organization, if they are being updated regularly on the progression of the specific projects or people that they chose to support!
Donor Experience
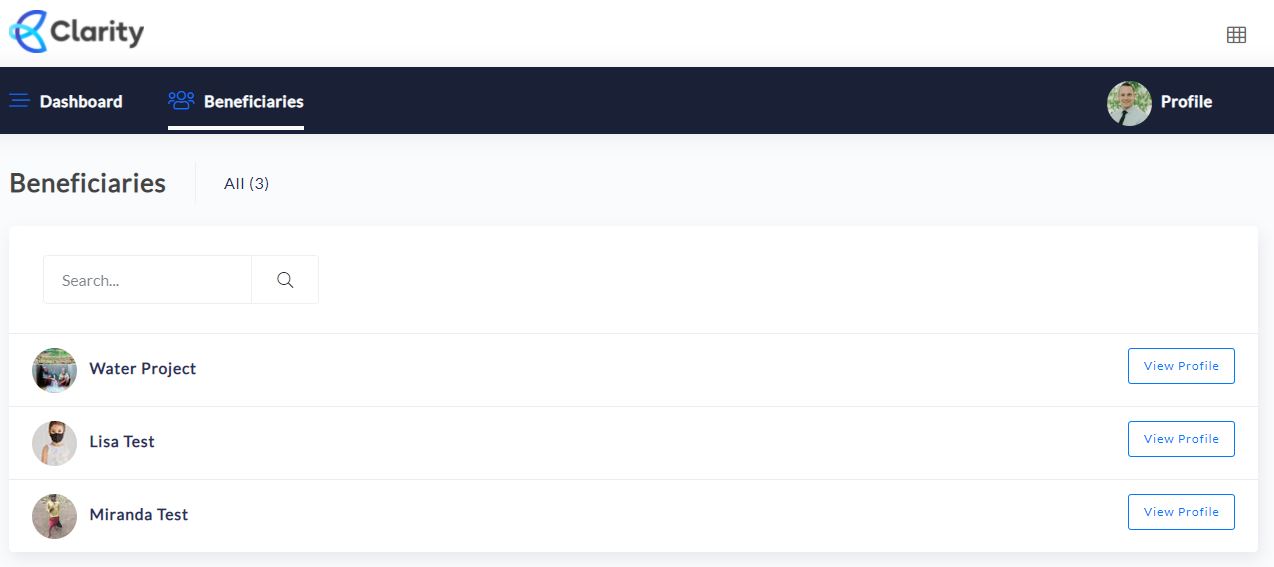
For completion, below is a photo of what a donor will see when they sign in to their profile. As seen they will only be updated by the specific beneficiaries that they support and the direct correspondence provided by your organization.
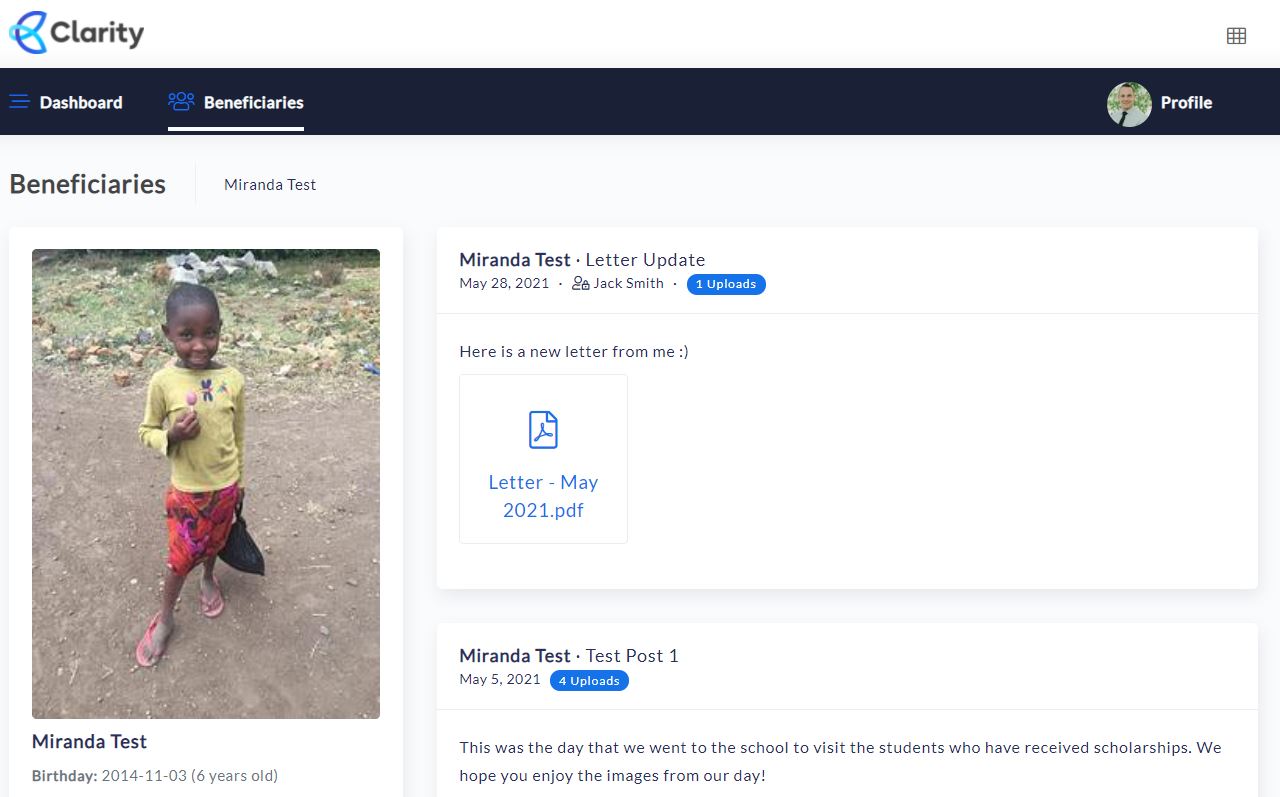
When the donor then clicks on one of the various beneficiaries, they will be able to see the entire profile of that beneficiary. This keeps them updated with all the recent activities that have been facilitated in relation to their donation. A glimpse of one of the beneficiaries profile’s is shown below. A reminder that by using custom fields, you can make these profiles specific to the types of beneficiaries that you deal with ✔️.
Our goal with this feature is to increase transparency within your organization’s community, and provide an additional level of data protection to the beneficiaries (and donors) that support your nonprofit organization. Information is sensitive, and it is time that nonprofits are intentional when it comes to who sees what. We hope to make that easier for you by providing software tools that can do the trick!
If you’d like to learn more about setting up these community database connections, or have any suggestions for improvements to this feature or functionality, please do not hesitate to reach out to [email protected]!